Search This Blog

Friday, December 17, 2010

Chemistry 101 (a/k/a "Sourdough Bread?")

I love sourdough bread.  I love San Francisco.  Ergo, I love San Francisco sourdough bread.  But I've always been somewhat intimidated by the concept of keeping a foaming, frothy jar of living organisms in my kitchen.  In fact, I spend a considerable amount of my day making sure all foaming, frothy living organisms are banished from my kitchen.  So should I attempt sourdough?  Oh sure...why the hell not?  If it fails, I've lost maybe $1 worth of ingredients.

So first I took a half cup of very warm water (about 115 degrees according to my trusty thermometer) and added to it 1/2 teaspoon of sugar.  Stir until the sugar disolves, and then add a packet of dry yeast.  Here is what it looked like at first...


And here is what it looked like 15 minutes later.  It's al-iiiiiive.  (That was a pretty sad Igor impersonation, but you get the idea.)


In a bowl, toss 1 cup of regular flour and 1/2 cup of whole wheat flour.  Stir in your scary-looking frothy yeast mixture and 3/4 cup of water. 


Then cover it loosely (otherwise, you'll have an explosion of gases when this stuff starts fermenting) and let it sit for 3 days.  I put mine among my odd collection of butternut and delicata squash that I still haven't figured out what to do with.

So stay tuned.  In about 3 days, I plan to try my hand at making crusty homemade San Francisco sourdough bread. 

(And keep your fingers crossed that whatever grows in this bowl doesn't creep over the side and start eating squash.)

Wednesday, December 8, 2010

Luxurious buttery shortbread cookies...in like 15 minutes! Whaaaaaat??

This time of year, I usually start craving shortbread with my coffee or eggnog.  No, not the tasteless little cardboard things topped with way-too-crunchy sugar that you get in the blue holiday tins at Walgreens for $2.  I'm talking buttery fresh shortbread with just the right amount of crumbly soft goodness.  Shortbread is one of those things like homemade croutons:  You think you don't like it, because you've only had the shitty stuff, but then you try the real deal and are blown away.

So here's the quick-n-dirty on how to make real shortbread that will make you roll your eyes and faint.

Cream together 2 sticks of butter with 1/2 cup sugar.  Easy enough.  Add to it 1/2 tsp salt, 2 egg yolks (NOT the whole egg) and 1 tbsp of vanilla extract.  Beat it all together with the mixer.


Toss the mixer beaters in the sink, and stir in (i.e., with a fork or spatula) 1 1/2 cups of flour.  Notice I said "stir", not "whip it like a red-headed stepchild".  Be gentle.  Your shortbread loves you. 

Your dough should look like this [see left pic].  Really smushy. 

That's it.  You're ready to roll...literally.


Divide the dough into two parts, use your hands to pat it into a ball and then roll out.  Forget the rolling pin, just use your hands.  Roll it into a log (THINK: kindergarten Play Doh logs with the palm of your hand...back and forth).  It'll look something like this. 


Then cut into thin slices.  I like my shortbread thin with a little crunch to it.  If you like yours a bit softer, make thicker slices.  Knock yourself out.


By the way, don't freak out if your cookies have a flat side when you slice the dough.  The dough is so soft, the side of the log that touches the counter will flatten out.  Me personally, I couldn't care less if my cookies have a flat side but if that disturbs you folks with OCD, just use your fingers to round it back out after you cut.


So we bake on a cookie sheet at 350 degrees for about 12 minutes.  I lined my cookie sheet with foil (because I'm friggin' lazy and don't like to hand-wash stuff that won't fill in the dishwasher).  I gave it the barest mist of non-stick spray...and I mean like one tiny "poof" from the can.  Too much and your cookies will burn on the bottom.  And we all know there's nothing worse than a burned bottom.  (Insert lewd thought here.)


Again, if you like 'em crispier, add a minute or two but watch them carefully.  They are ready when the edges start to just BARELY darken a tad.  If you wait for the cookies to "turn brown", you're going to be tossing out brown discs to the dog.  Below is how they should look.

Bottom


Variations:  You can kick it freestyle on these quite a bit.  Some folks like to dust them with sugar; others with kosher salt.  I've seen chocolate shortbread, shortbread with raisins or currants, etc.  I'm a purist thought.  If the shortbread is good, it stands alone. 


Things I Learned Today....
  1. Put the lid back on the vanilla after you're done with it.  That way, when your clumsy ass bumps it over reaching for the flour, it won't spill all over the counter and drip onto the floor that you just mopped.  (Grrrrrrrrrrr).  Happy news:  My kitchen smells very vanilla-y.
  2. Do not ever make shortbread when hungry.  You will eat a ton of dough (INTERNAL LIAR: "Oh, look, that piece isn't shaped just right.  You should eat that.  Uh oh, you're going to have an odd number on that row.  Better eat that extra one.")  I feel a bit queasy.  I'm pretty sure I'll be very unproductive the rest of the day.

Monday, December 6, 2010

I made mozzarella at home! No really, I did!

This was one of those "I wonder if I could...." things.  I saw it in a magazine awhile back (Mother Earth News, I think) and started thinking of how much mozzarella we use at our house x $4.99 for the crappy stuff at Walmart or even $7.99 for the organic kind at Whole Foods.  Economically, it made sense...and I could only imagine that the flavor would be better.

So when I decided to quit my job, that was one of the things on my project list:  "Make Fresh Mozzarella???"  (And yes, it did have three question marks.)

I have to be honest:  I did a pretty bad job of documenting the process since, quite honestly, I wasn't sure it would turn out and I didn't want to waste my time making pictures.  (I know...tsk, tsk.  So much for confidence, eh?)  But I guess a bigger reason was that I was so wrapped up in measuring, timing, etc. that I really didn't have time to take a lot of photos.  (However...I promise to next time.)

All in all, it was really easy.  About 30 minutes from start to finish, which really surprised me.  I kept saying "That's it?  Really?  I can eat it now?"  And eat it I did.  Chris and Evan (my husband and 6-year-old) were out for a bit, and I had finished about half a lb of product by the time they got home.  :: guilty smile ::

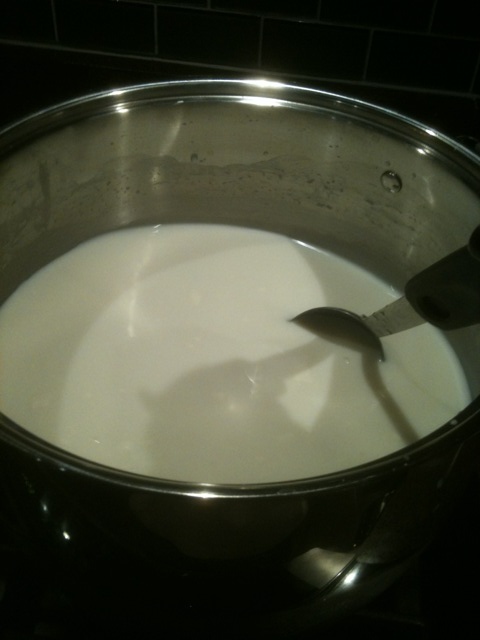
So you start with a gallon of unhomogenized whole milk.  This milk is from Rock Springs Dairy, our local Mennonite (or maybe they're Amish, who knows) dairy farmers.  It's grass-fed, totally organic.  The main thing to remember when making cheese is that the milk CANNOT be homogenized.  That rules out grocery store milk.  Milk that has been homogenized does not separate and the cream does not rise to the top of the container. 

This milk in the picture has a nice thick "cream plug" just beneath the bottle neck.  Gross in a way, but it's a sure sign of quality unhomogenized milk.


You dump all the milk (including that flabby little cream plug!) into a really big stainless steel pot.  No aluminum.  Also, make sure you are using a stainless steel spoon.  You heat the milk, add some rennet and citric acid (I have the exact amounts written down somewhere, I swear) and then cover it with a lid.


Then the most miraculous thing happens about 5-7 minutes.  You lift the lid and you're looking down at a solid mass of what looks like yogurt.  It is a big hunk o' "cheese in the making" floating in a sea of clear whey! 

Once it's solid enough to put your hand into and feel resistence (which is actually kinda fun), you take a very long knife and start slicing it into cubes.  (Also fun.)


Then you stir the cubes around while you heat it again.  Pretty soon, all the cubes start to clump together.  (See the picture at the right)
Then you're stirring around a big stringy hunk of mozzarella!  Awesome-ness!


The next step is to drain away the whey, which is the liquid stuff.  You then don some oh-so-sexy rubber gloves, nuke the mozzarella in the microwave for 30 seconds and pull it like taffy.  (Hence, the need for the rubber gloves.  That stuff was HOT!)

In about 2 or 3 minutes, it turns shiny.  And you have mozzarella.  :)

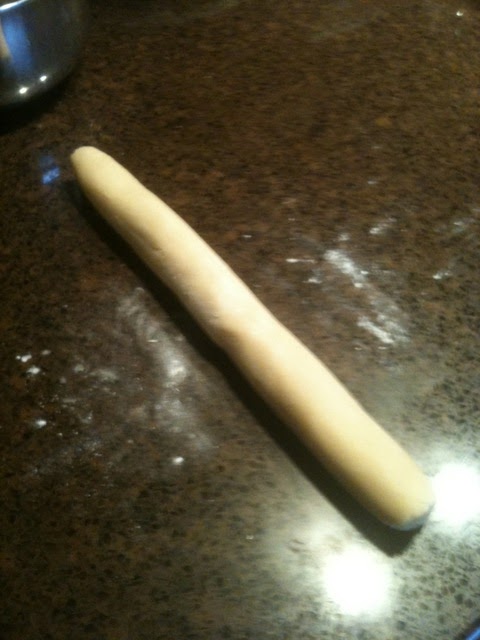
TA-DA!  STRING CHEESE!

So...to recap...you CAN make mozzarella at home in like 30 minutes.  It's delicious, cost-effective...and you know what's in it, unlike the white cubes of Walmart stuff.  (Maybe I should make this and sell it?  Teach classes for other Domestic Deities?  Or maybe just eat it like a pig and be happy.)

Saturday, December 4, 2010

Applesauce, schmapplesauce...

Yesterday was quite a productive day.  After driving myself nuts with to-do lists and projects earlier in the week, I found myself with renewed energy and a bit more spare time than usual.  Add to this a large bowl of getting-mushy apples, and you have yourself an idea "Make applesauce!"

So here's how it all unfolded.  I started with 7 apples of various varities and colors.  Five (the red ones) were organic, from one of the fine Mennonite farm families nearby.  The other two (the green ones) were from Kroger.  (I'm not much for math, so I'd say this is...ummm...mostly "organic" applesauce?)

Using a veggie peeler (READ: no need for a Band-Aid afterward), I peeled the apples.  Then I sliced, cored and cut them into chunks.  No need to be persnickety about how big the chunks are - they're just going to mashed up anyway, ya know.
Dump the apple chunks into a big pot (loving my Martha Stewart enameled dutch oven!), add 1/4 cup plain ol' white sugar and 2 cups of water.  Bring to a boil, then turn it down to a simmer.  Simmer covered for about 45 minutes.  Give it a good stir about every 10 minutes or so.  It smells yummy while you're cooking it!

Now and then use the back of your wooden spoon to smush the apples against the side.  It will go from chunky to smooth as you do.  I like my applesauce with a bit of texture, not the babyfood type consistency.  If you like the runny type, then mash away.


So after about 45 minutes, it looks like this....


Now just add a teaspoon of lemon juice and a 1/2 teaspoon of cinnamon.  Taste it, and add more lemon and/or cinnamon to suit your taste.  I like just a touch of lemon but a buttload of cinnamon, so that's what I did.  Do your own thing.


I got about 3 jars of applesauce from the 7 apples.  Below is a shot of two of the jars.  (I didn't have a third empty jar, but no sweat since I'm using the extra applesauce in a chicken recipe tonight for dinner anyway.)

All in all, it was super easy.  WAY better than the store-bought stuff.  And, of course, much cheaper since I already had everything I needed at home.  (Except a third empty jar, but hey...)

It turned out great.  No bad surprises.  No lessons learned the hard way. For once.

Thursday, December 2, 2010

Things I've Learned This Week....

(Not in any particular order of importance or chronology...)

1.  Magnetic screwdrivers are the BOMB!  I have long fingernails.  I spent the greater part of an hour trying to pick up, position and hold a tiny screw.  Enter the magic magnetic screwdriver.  It picked up, positioned...and yes, HELD, the tiny screw for me whilst I did my thing.  Now I know why men go so nuts for those things.  Totally worth a few extra bucks!


2.  When a recipe calls for an amount of beer less than a full bottle, always use cold beer from the fridge rather than a room temp one.  Why?  Well, duh...so you can drink what's left in the bottle after you use some/half/most for your recipe.  Lesson learned on that one.


3.  Those nifty little plastic bins that strawberries and blueberries come in aren't dishwasher safe.  Umm, yeah.  So much for using those to grow alfalfa sprouts in the kitchen windowsill.

So here I am....

I am mid-way through my first week as a stay-at-home mom, and I realized that I have learned so much already I should somehow document this.  Two reasons:  (1) So my family, friends and total strangers can have proof at last that I am nuts...and (2) So that when I go back to work outside the home someday, I can read this over to remind myself of this whole crazy experience. 

I've named my blog "Off The Hamster Wheel" since that's exactly what I've done...jumped off the crazy hamster wheel of a full-time working mom trying to juggle housework, paying bills, being there for my son when he needs a "mom" vs a "working mom", etc.  My husband and I realized that my stress level was simply too high to continue that way, and I have to admit he did a very good job of convincing me that I was going to lose my damn mind if I didn't hop off the wheel soon.

I plan to post (as time permits) on lessons I learn as I go along.  I have never been a stay-at-home mom, so I'm sure some of my "discoveries" will be things many readers will roll their eyes about and mutter "Well, DUH."  (Screw them anyway.)

Feel free to comment. But if you're a jerk, I'll either call you out or ignore you.  That's how I roll.